Monday 27 August 2018

Using Negative Images

Hello Stampers

Just thought I would share with you all today an example of using a negative image for other Card/ Scrapbook Page Creations.

I recently attended a Card Class with one of my talented Team Members and we made a Christmas Card using a new Stamp Set and Thinlit Bundle called "The Merry Christmas To All" set coming soon in the new Holiday Catalogue.  Here is the initial card we made...


So after this card I was left with a negative image of the "Merry Christmas"


And for those who know me I cannot throw anything away too easily 😆😆 so I thought what can I do with this piece???  Make another Christmas Card before I throw it away.

Firstly I started with a cute hanging star pattern from another new stamp set coming soon 😉 called "Making Christmas Bright" and then grabbed my sponge daubers.  A little Pear Pizazz ink later and I had my second card nearly done.


I added a few little snowflakes from the "Seasonal Layers" Thinlits and the Sparkle Glimmer Paper to finish off.


Quick and easy Christmas Cards ready to go!
Have a fabulous day everyone 😀

Happy stamping
Janette


Sunday 12 August 2018

Garden Impressions Suite

Hello Stampers

Thought I would have a play with my "Garden Impressions" Suite today and tried all the ways to use the "Springtime Impressions" Thinlits Dies. 

I teemed Petal Pink colours with the "Petal Promenade" Designer Series Paper and they go just so well together.  So subtle and feminine.

The first card is using the large flower bunch thinlit and Petal Pink on Petal Pink (tone-on-tone) Love this look. 


 A big hint I really must stress is - don't be too hasty getting the paper out of the die.  It will break easily.  I used a new tool that is coming soon on September 5 in the new upcoming Holiday Catalogue. It is called a "Take Your Pick" Tool and I assure you it will be your go-to tool every day when you get it 😀 It has multiple changeable ends to cater for all uses.  This is just 2 of them. One end has putty to act as a Jewel Picker and the other end has a paper-piercer.  I used this paper-piercer end to gently get the card out of the die.


To glue the large fine flower bouquet to the card I used the sponge and glue technique..


Just dab your sponge in a little glue and then on the back of the flower bunch on the silicone pad.  Then place on main card.  You could also use the Multipurpose adhesive sheets.

I thread the Crumb Cake Nature's twine through the top of the single leaf from the "Leaves Trinkets".  This twine is super thick and would not fit through first so I unwound the thread and removed 2 strands leaving 3 strands to push through the small holes at the top of the leaf, once again, with the paper-piercing end of the "Take Your Pick" Tool.  I saved the 2 strands for another project later. 😉 I frayed the ends of the twine after tying a bow and fixing the leaf to the card with a glue dot.


Finishing the card with the greeting from the "Dandelion Wishes" stamp set and a special Wedding Card, I think, ready for that special couple.


For the second card I then used the negative image after cutting out the flower bunch for card 1.  I had a "Petal Pink" cardbase ready for the second card and placed the die at the edge to ensure placement was correct for the second card.


I placed a piece of the "Petal Promenade" Designer Series Paper behind the negative image and used the sponge gluing method again on the back of the cardstock then placing the paper over.  The reverse side of this paper is so perfect with the bokeh effect.


The greeting on the front and the inside saying are both from the "Special Celebrations" Stamp Set 

I finished off the front by sponging "Petal Pink" ink around the edges of the cut out, added a little bow at the bottom because I think it looks like a bunch of flowers and a few sequins.  These were added using the putty end of the Take Your Pick tool.


The third card is using the Embossing Technique with the thinlit.    I had the Stampin' Up! Big Shot Embossing Mats and had not yet used them so here goes!!


What a beautiful effect. I just added a greeting in Petal Pink also.  I did emboss it by placing the stamp on the Versamark Ink Pad first then straight on to the Petal Pink Ink Pad then on to the card and sprinkling with clear embossing powder.  It is hard to see in this pic but it does have a nice shimmery effect.   A couple of rhinestones and some Petal Pink Metallic Ribbon and wallah!!!!


If you live in Australia, don't already have a Demonstrator to help you,  and would like a copy of the new exciting Holiday Catalogue starting soon just email me here and one will be making it's way to you straight away 😊😊

Happy Stamping
Janette

Wednesday 8 August 2018

Colour Your Season!

Hello Stampers

August really is an exciting month with everything "Stampin' Up!"  There are All-New, Limited-Time "Colour Your Season" Products available for August only!

It includes:-
  •  Blended Seasons Stamp Set, an exclusive 10-piece wood- or clear-mount stamp set with images for every season!
  • Stitched Season Framelits Dies, a coordinating stitched die that includes stitching on both the positive and negative images!
  • Watercolor Pencils in 10 new colours! Note: These Watercolor Pencils may be available in a future publication.
  • Please note: The bundle includes the stamp set and dies only. It does not include the Watercolor Pencils.


There are already so many beautiful ideas on Pinterest using this Bundle.  Just type in the search bar - Stampin' Up! Color Your Season and wallah!!!


This set has great sentiments and such a lovely font.  Just click on the relevant pic/icon below to go straight to my shop. 

For those shopping in Australia, don't forget to use my August Hostess Code ZNXFFTHC for a selection of "Under the Mistletoe" Christmas Designer Series Paper as a little gift from me.

Happy Stamping
Janette


Sunday 5 August 2018

Exciting August!

Hello Stampers

August is here and that means only just a little over 4 weeks till our new Holiday Catalogue goes live. I am a little excited as I have seen all the fun Christmas goodies inside 😀😀 I love being a Demonstrator and seeing and playing with new products first.

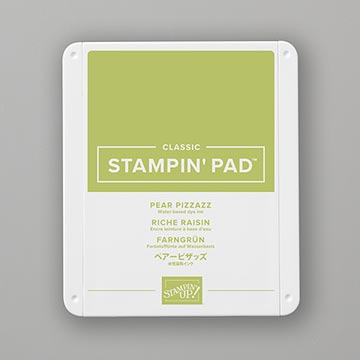
I have welcomed 3 new Team Members last month with the fabulous Ink Pad Promotion.  What a great deal they got!!

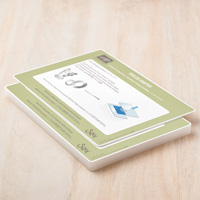
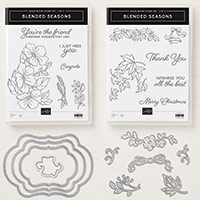
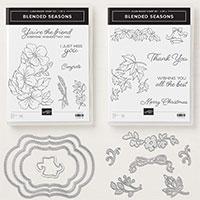
I can show you the front page as a little teaser...


I will have copies in my hot little hands this week so if you are one of my regular customers one will be in the mail to you real soon.  If you are not a regular customer and would like to be, just email me here for your copy.

My Class dates for September, October and November have now been allocated..

SEPTEMBER
Tuesday 25TH          9:30 am – 11:00 am       Coffee, Cake & Card Morning Myrtle’s Cafe                    Wednesday 26th    9:30 am – 11:30 am        Beginners Class My Place
Saturday 29th        2:00 pm – 4:30 pm          Theme TBD My Place
Saturday 29th        9:30 am – 11:00 am        Coffee, Cake & Card Morning Myrtle’s Cafe  
Saturday 15th        9:00 am – 12:00 pm        Sunnie Coast Stampers Group Craft & Chat
OCTOBER
Wednesday 17th    9:30 am – 11:30 am         Beginners Class My Place
Tuesday 23rd         9:30 am – 11:00 am         Coffee, Cake & Card Morning Myrtle’s Cafe 
Saturday 27th        9:30 am – 11:00 am         Coffee, Cake & Card Morning Myrtle’s Cafe 
Saturday 27th        2:00 pm – 4:30 pm           Theme TBD My Place
 Saturday 13th       1:00 pm – 5:00 pm            Sunnie Coast Stampers Group Craft & Chat
NOVEMBER
Tuesday 27th         9:30 am – 11:00 am          Coffee, Cake & Card Morning Myrtle’s Cafe                      
Wednesday 21st    9:30 am – 11:30 am          Beginners Class My Place
Saturday 17th         1:00 pm – 5:00 pm            Sunnie Coast Stampers Group Craft & Chat 

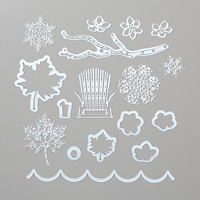
If you are unable to get to my classes at Little Mountain then you can do my Class-by-Mail as mentioned in my previous post. Here is a little sneak peek of the cards in the August Class-by-Mail using the stamp set "Tabs for Everything".


AUGUST HOSTESS CODE
when ordering online at my shop don't forget to add this month's Hostess Code ZNXFFTHC and receive an extra free gift from me.  This month you will receive a selection of the new "Under the Mistletoe" Designer Series Paper to get your Christmas cards started.

BONUS COUPONS DURING AUGUST


For every $90.00 spent during the month of August you will receive a $9.00 bonus coupon to spend during the month of September. Another fabulous reason to place those "Wish List" orders during August.


Happy Stamping
Janette


Wednesday 1 August 2018

August Class by Mail

Hello Stampers

Well it is August already!!!!  Where does the time go??? This is a very exciting month for us Demonstrators as we get to see the new Holiday Catalogue with all the new fun Christmas things inside!!  Ooh!! I love it all 😁😁 My Wish List is oh so long already.

Watch this space for some new samples coming soon.

Meanwhile my August Class by Mail is featuring the "Tabs for Everything" Stamp Set on Page 49 of the Annual Catalogue.  This stamp set can be overlooked quite easily but at $30.00 for 53 Photopolymer stamps it is superb value and you can do just so much with it.  One card I made today is quite simple but gets the message across perfectly 😉  I just had to use the new
"Highland Heather" and "Gorgeous Grape".  So this is what I came up with....


So I have 2 options for you as this stamp set also co-ordinates with the "Circle Tab Punch"

OPTION 1 - For $30.00 you get the Stamp Set + 4 card kits with instructions and including postage to anywhere in Australia

OPTION 2 - For $70.00 you get the Stamp Set and the Circle Tab Punch + 4 card kits with instructions and some bonus embellishments and including postage to anywhere in Australia.

Just email me here if you would like to join in on this "Class by Mail" or if you want any more info

Happy Stamping
Janette